Creating Pong
Creating my first game in Phaser

My first task was creating a clone of Pong, Pong is one of the earliest arcade games ever created, it's based on a game of ping pong, where you have two paddles and a ball and need to prevent the ball from crossing your paddle. It can be played with 2 players, each controlling his own paddle, or with one player and the computer controlling the other.
I see it as some form of a "hello world" example for game development. It has a few simple game objects (2 paddles and a ball), the ball should bounce off the paddles, and if a ball touches the screen behind a paddle the game is finished.
It can also be extended, to add the concept of a score, and play towards a score. you can add sounds to it, and another main screen to choose how many players are playing. Further, we can add support for multiplayer, playing online for high scores, and mobile gaming.
How to start?
Every development project should start not with writing code (although I did and still do it many times), but with writing some text. Objectives, minimal objectives, and nice to have extensions, write some plan, which objects I am going to have, how they interact, and write a list of tasks.
Plan
Game objects:
- Ball
- Paddle
- Score
Game rules:
- Player 1 controls the left paddle
- Player 2 controls the right paddle
- The ball bounces off the walls
- The ball bounces off the paddles
- The ball is lost if it goes off the top or bottom of the screen
Screens:
- Main menu
- Choose the number of players
- Play
- Game screen
- Game over screen
- High score screen
MVP Tasks
- Create a game object for the ball
- Create a game object for the paddles
- Create a game object for the score
- Game screen
- Draw the ball
- Draw the paddles
- Draw the score
- 2 Players:
- Player 1 controls the left paddle (W and S)
- Player 2 controls the right paddle (Up and Down)
- Ball starts in the middle of the screen and goes to the direction of the paddle that hit it last (or to player 1 if none)
- The ball bounces off the walls
- The ball bounces off the paddles
- The ball is lost if it goes off the left or right of the screen
- The game is won if a player reaches 10 points
Possible Extensions
- More screens
- 1 player game
- mobile game
MVP stands for "Minimum Viable Product", it's the minimum requirement I need to release. I've got to say thanks to Github Co-pilot which added some requirements and tasks I didn't think about. I'm having a hard time writing documents, and it's nice that tools like that help with it. I don't use CoPilot to write this blog :)
Part 1 - Creating a structure for the game.
one of my problems with the phaser tutorial is that the code is written in bare HTML, inside a script tag. For a first tutorial, it's great, because it shows the bare minimum of what I need to create a game, but if we want the code to be small and easy to reason about, we should use a bundler, like webpack or vite, and maybe a type system like TypeScript. So I went looking for a project structure to start from, one using vite and typescript. Why vite? because I never used it and I wanted to try it.
I found https://github.com/ubershmekel/vite-phaser-ts-starter which looks pretty good and basic to start from. its only dependencies were typescript, vite, and phaser, and it had an index.html, main.ts, menu-scene.ts, and style.css. So I took it. I forked the repository into https://github.com/chiptus/phaser-pong and pulled it to my local computer.
Usually, my first thing would be to clean the things I don't need, but as it's my first project, I wasn't sure what was not needed so I just went with it. I did upgrade phaser to its last beta version and added the list I made under Plan.
Part 2 - Drawing the initial screen
I also needed two assets, the paddles and a ball. I went with the simplest things, opened Pinta and drew a circle and a line, and saved it as a png.
Then I went into vscode and started writing the code to draw the initial screen.
The project structure I used had an index.html, which is the starting point of this project, and this is how vite knows what to compile. It includes a few buttons to make the screen full screen, mute the game and reload the page. It also includes <div id="app" /> element that is where Phaser will inject the game, and a script tag that points to /src/main.ts. vite knows how to process this tag.
main.ts is the main script file. It initiates the Game and configures it. It also imports the list of scenes we have in this game, here we have only one scene MenuScene. MenuScene creates a simple "game" which has a random number of particles falling from the sky, and pressing "S" restarts it with a gasping sound.
I deleted the menu scene and created a new game-scene file that contains a GameScene class that extends Phaser.Scene the base Scene class for Phaser. Similar to the phaser tutorial, we can implement preload, create and update functions to run the game
My first objective is to draw the scene, so let's import the ball and paddle images:
// at the top
import ballUrl from "../assets/ball.png";
import paddleUrl from "../assets/paddle.png";

// inside the class definition
preload(): void {
    this.load.image("ball", ballUrl);
    this.load.image("paddle", paddleUrl);
}
the import statements are importing the images as URL, and in preload we can use that URL to load the image.
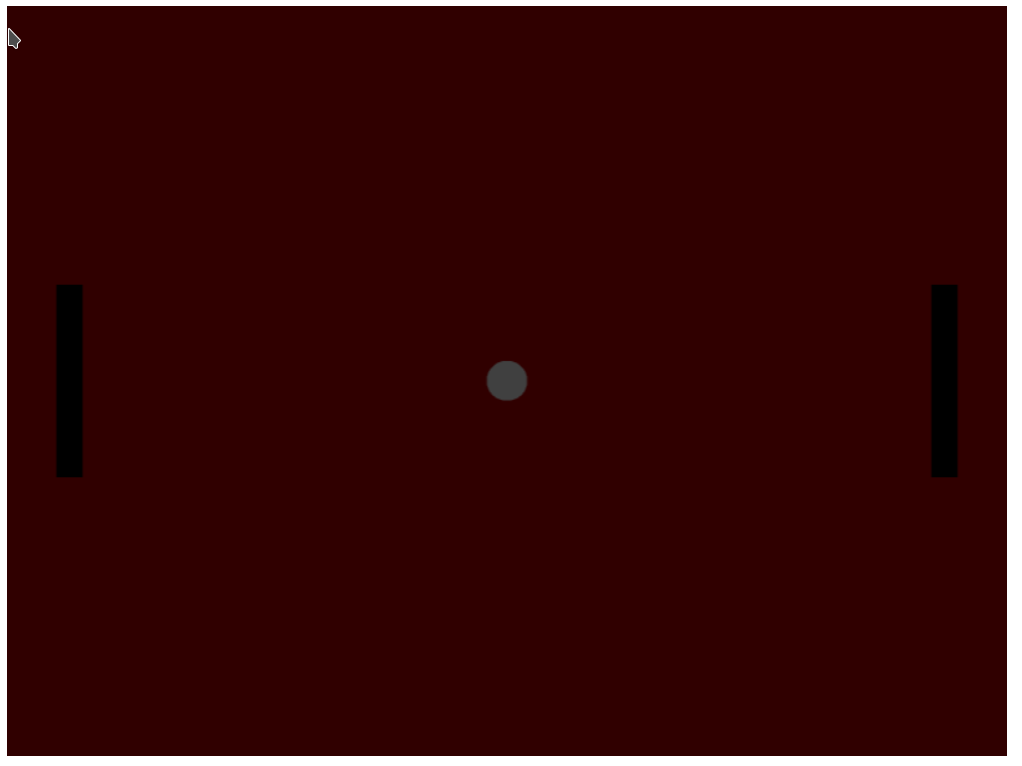
in create we actually draw the scene:
create(): void {
    // draw the ball
    this.add.image(400, 300, "ball");

    // draw left player
    const playerL = this.physics.add.image(50, 300, "paddle");
    playerL.setCollideWorldBounds(true);

    // draw right player
    const playerR = this.physics.add.image(750, 300, "paddle");
    playerR.setCollideWorldBounds(true);
}
now we should see something like this:
you might see your game screen expands. I still need to work it out, but removing the lines
    mode: Phaser.Scale.FIT,
    autoCenter: Phaser.Scale.CENTER_BOTH,
from main.ts fixed it.
Part 3 - Controlling the paddles
In this part, we want to be able to control the paddles using our keyboard. Looking to our requirements, the right player should be able to use "Up" and "Down" cursors to control his paddle while the left player should be able to use the "W" and "S" keys.
We need a way to catch clicking on those different keyboard keys and move the paddles accordingly. This is usually done in the update method of the scene. Since it's a class, we don't want to use global variables for the players and keys like we did one the phaser tutorial, but we will bind them to the class.
So we need to add the right fields to our scene class:
export class GameScene extends Phaser.Scene {
  playerL?: Phaser.Types.Physics.Arcade.ImageWithDynamicBody;
  playerR?: Phaser.Types.Physics.Arcade.ImageWithDynamicBody;

  cursors?: {
    keyW: Phaser.Input.Keyboard.Key;
    keyS: Phaser.Input.Keyboard.Key;
    keyUp: Phaser.Input.Keyboard.Key;
    keyDown: Phaser.Input.Keyboard.Key;
  };

...
How did I know the right types? by checking the return value for this.physics.add.image and for the keys, by checking the functions we will use soon.
the create function will be modified to the following:
create(): void {
    // draw the ball
    this.add.image(400, 300, "ball");

    // draw left player
    this.playerL = this.physics.add.image(50, 300, "paddle");
    this.playerL.setCollideWorldBounds(true);

    // draw right player
    this.playerR = this.physics.add.image(750, 300, "paddle");
    this.playerR.setCollideWorldBounds(true);

    const keyW = this.input.keyboard.addKey(Phaser.Input.Keyboard.KeyCodes.W);
    const keyS = this.input.keyboard.addKey(Phaser.Input.Keyboard.KeyCodes.S);
    const keyUp = this.input.keyboard.addKey(Phaser.Input.Keyboard.KeyCodes.UP);
    const keyDown = this.input.keyboard.addKey(
      Phaser.Input.Keyboard.KeyCodes.DOWN
    );

    this.cursors = {
      keyW,
      keyS,
      keyUp,
      keyDown,
    };
}
instead of just drawing the players we save the return value of .add.image to this.playerX and we're adding a pointer to the relevant keyboard keys.
handling key press and changing the player velocity is done in update:
update(): void {
    // make sure all relevant properties are defined
    if (!this.playerL || !this.playerR || !this.cursors) {
      return;
    }

    // handle left player movement
    this.playerL.setVelocity(0);

    if (this.cursors.keyW.isDown) {
      this.playerL.setVelocityY(-300);
    } else if (this.cursors.keyS.isDown) {
      this.playerL.setVelocityY(300);
    }

    // handle right player movement
    this.playerR.setVelocity(0);

    if (this.cursors.keyUp.isDown) {
      this.playerR.setVelocityY(-300);
    } else if (this.cursors.keyDown.isDown) {
      this.playerR.setVelocityY(300);
    }
}
The first line is what typescripts calls Type Narrowing. Although we know (from create) that all the class properties should be defined, TypeScript doesn't have a way to know that create is always called before update, so this.playerL can be undefined. So we add a check for falsy values, and after the first if statement, we know that playerL and the other properties are defined.
The handling of both player's movements is almost the same, the only difference is the keys we use:
- set speed to 0 - this makes sure that if any key is not clicked, the paddle won't move.
- if up key (w for playerL) - set speed to negative 300, so the paddle will go up.
- if down key (s for playerL) - move down
It should work like this:
Part 3 - Bouncing ball
Like we did for the players, let's add a ball property for the ball game object and save the game object to it:
class GameScene {
  ball?: Phaser.Types.Physics.Arcade.ImageWithDynamicBody;

  create(): void {
    this.ball = this.physics.add.image(400, 300, "ball");
  }
}
the ball is required to:
- move
this.ball.setVelocity(200, 200);
- collide with the world bounds
this.ball.setCollideWorldBounds(true);
- collide with the paddles
this.physics.add.collider(this.playerL, this.ball);
this.physics.add.collider(this.playerR, this.ball);
- bounce off of them
this.ball.setBounce(1);
- stop the game if colliding with the left or right world bounds.
We will do this soon, let's see how it goes until now:
this.ball = this.physics.add.image(400, 300, "ball");
this.ball.setVelocity(200, 200);
this.ball.setCollideWorldBounds(true);
this.physics.add.collider(this.playerL, this.ball);
this.physics.add.collider(this.playerR, this.ball);
this.ball.setBounce(1);
For some reason, if you look at your game, the ball bounces nicely when touching the world bounds, but touching the paddles this happens:

This took me a long time to solve. Looking into the tutorial didn't help as it uses almost exactly the same code. I don't remember how I found it out, but the realization that in contrast to the tutorial where the platforms were static objects, here, the paddles are dynamic, and we can't make them static, because they should move. So I have found the property of a dynamic object called pushable . from the docs:
A body that cannot be pushed will reflect back all the velocity given to the colliding body. If that body is also not pushable, then the separation will be split between them evenly.
The following solves the issue:
this.playerL.setPushable(false);
this.playerR.setPushable(false);
The last thing we need is to stop the ball when it reaches the left/right world bounds. A world object this.physics.world has an event called worldbounds (or the constant Phaser.Physics.Arcade.Events.WORLD_BOUNDS - better to use), but it's only called for game objects that have the property gameObject.body.onWorldBounds = true. I guess it's to reduce memory usage. so we need to run the following code:
this.ball.body.onWorldBounds = true;
this.physics.world.on(
  Phaser.Physics.Arcade.Events.WORLD_BOUNDS,
  (
    body: Phaser.Physics.Arcade.Body,
    up: boolean,
    down: boolean,
    left: boolean,
    right: boolean
  ) => {
    // to filter events on other objects
    if (body.gameObject !== this.ball) {
      return;
    }

    // only stop if it reaches to left or right bounds
    if (right || left) {
      this.ball.setVelocity(0, 0);
    }
  }
);
Part 4 - A little refactor
As the game scene file becomes bigger, it also becomes more unreadable, so I think it's time to do some refactoring before doing anything else.
Let's move the player and ball logic into two respective classes:
Player.ts
export class Player {
  constructor(options) {}
  create() {}
  update() {}
}
Ball.ts
export class Ball {
  constructor(options) {}
  create() {}
  update() {}
}
These classes will handle all the logic that is related to their objects and we will use them like this:
game-scene.ts
export class GameScene extends Phaser.Scene {
    ball: Ball;
    playerL: Player;
    playerR: Player;

     constructor() {
        super({
          key: "GameScene",
        });

        this.playerL = new Player({scene: this});
        this.playerR = new Player({scene: this});
        this.ball = new Ball({scene: this})
    }

    ...

    create() {
        this.playerL.create()
        this.playerR.create()
        this.ball.create()
    }

    update() {
        this.playerL.update()
        this.playerR.update()
        this.ball.update()
    }
}
These are the basics, we will change some of them. like adding collisions between the players and the ball.
each object needs to be drawn, let's do that first:
Draw the objects
Player.ts
import { Physics, Scene } from "phaser";

interface Options {
  scene: Scene;
}

export class Player {
  scene: Scene;
  gameObject?: Physics.Arcade.Image;

  constructor({ scene }: Options) {
    this.scene = scene;
  }

  create() {
    // draw left player
    this.gameObject = this.scene.physics.add.image(50, 300, "paddle");
    this.gameObject.setCollideWorldBounds(true);
    this.gameObject.setPushable(false);
  }

  update() {}
}
this will draw the left player, to draw the right player we need to pass a different X value to add.image. We can use the Options interface for it:
Player.ts
import { Physics, Scene } from "phaser";

interface Options {
  scene: Scene;
  startX: number;
}

export class Player {
  scene: Scene;
  gameObject?: Physics.Arcade.Image;
  startX: number;

  constructor({ scene, startX }: Options) {
    this.scene = scene;
    this.startX = startX;
  }

  create() {
    // draw left player
    this.gameObject = this.scene.physics.add.image(this.startX, 300, "paddle");
    this.gameObject.setCollideWorldBounds(true);
    this.gameObject.setPushable(false);
  }

  update() {}
}
game-scene.ts
this.playerL = new Player({ scene: this, startX: 50 });
this.playerR = new Player({ scene: this, startX: 750 });
Now for the ball, it's very similar:
Ball.ts
import { Scene } from "phaser";

interface Options {
  scene: Scene;
}

export class Ball {
  scene: Scene;
  gameObject?: Phaser.Physics.Arcade.Image;

  constructor({ scene }: Options) {
    this.scene = scene;
  }

  create() {
    this.gameObject = this.scene.physics.add.image(400, 300, "ball");
  }

  update() {}
}
Now we should be able to see the same screen we see at the end of Part 2.
Control the paddles
To move the paddles, the game scene needs to tell each player which keys are controlling it:
game-scene.ts
this.playerL = new Player({
  scene: this,
  startX: 50,
  cursors: {
    keyDown: Phaser.Input.Keyboard.KeyCodes.S,
    keyUp: Phaser.Input.Keyboard.KeyCodes.W,
  },
});
this.playerR = new Player({
  scene: this,
  startX: 750,
  cursors: {
    keyDown: Phaser.Input.Keyboard.KeyCodes.DOWN,
    keyUp: Phaser.Input.Keyboard.KeyCodes.UP,
  },
});
and in Player.ts we need to respond to them
import { Physics, Scene } from "phaser";

interface CursorOptions {
  keyUp: number;
  keyDown: number;
}

interface Options {
  scene: Scene;
  startX: number;
  cursors: CursorOptions;
}

export class Player {
  scene: Scene;
  startX: number;
  cursorOptions: CursorOptions;

  gameObject?: Physics.Arcade.Image;
  keyUp?: Phaser.Input.Keyboard.Key;
  keyDown?: Phaser.Input.Keyboard.Key;

  constructor({ scene, startX, cursors }: Options) {
    this.scene = scene;
    this.startX = startX;
    this.cursorOptions = cursors; // accept the cursor keys
  }

  create() {
    this.gameObject = this.scene.physics.add.image(this.startX, 300, "paddle");
    this.gameObject.setCollideWorldBounds(true);
    this.gameObject.setPushable(false);

    // bind to these keys
    this.keyUp = this.scene.input.keyboard.addKey(this.cursorOptions.keyUp);
    this.keyDown = this.scene.input.keyboard.addKey(this.cursorOptions.keyDown);
  }

  update() {
    // handle player movement
    this.gameObject?.setVelocity(0);

    if (this.keyUp?.isDown) {
      this.gameObject?.setVelocityY(-300);
    } else if (this.keyDown?.isDown) {
      this.gameObject?.setVelocityY(300);
    }
  }
}
Bounce the ball
First, we can add the following lines to Ball's create method, so the ball moves and collides with the world bounds:
this.gameObject.setVelocity(200, 200);
this.gameObject.setCollideWorldBounds(true);
this.gameObject.setBounce(1);
Now, the ball passes through the paddles, and we should add set the ball to collide with them. So the ball should have a reference to them:
type PlayerTuple = [Player, Player];

interface Options {
  scene: Scene;
  players: PlayerTuple
}

export class Ball {
  scene: Scene;
  players: PlayerTuple

  gameObject?: Phaser.Physics.Arcade.Image;

  constructor({ scene, players }: Options) {
    this.scene = scene;
    this.players = players
  }

    ...

}
game-scene.ts
this.ball = new Ball({
  scene: this,
  players: [this.playerL, this.playerR],
});
and now I can add a collision with their game object: Ball.ts
create() {
    ...
    this.players.forEach((p) => {
      if (p.gameObject && this.gameObject) {
        this.scene.physics.add.collider(this.gameObject, p.gameObject);
      }
    });
}
it's not the most beautiful piece of code I wrote, but it works.
and we need to make sure the ball stops when it collides with the right or left bounds:
Ball.ts
this.gameObject.body.onWorldBounds = true;
this.scene.physics.world.on(
  Phaser.Physics.Arcade.Events.WORLD_BOUNDS,
  (
    body: Phaser.Physics.Arcade.Body,
    up: boolean,
    down: boolean,
    left: boolean,
    right: boolean
  ) => {
    if (body.gameObject !== this.gameObject) {
      return;
    }

    if (right || left) {
      this.gameObject.setVelocity(0, 0);
    }
  }
);
Typescript will complain about this.gameObject.body.onWorldBounds being unreadable, so we need to change gameObject type to Phaser.Types.Physics.Arcade.ImageWithDynamicBody
Part 5 - Taking score
So now we have the option to play 2 players until the ball reaches the screen bounds. Let's add score to the game. We can have each player hold his score, but since it's a state that the game notices, we will keep it in the Scene object:
game-scene.ts
class GameScene {
    score: {
        left: number;
        leftText?: Phaser.GameObjects.Text;
        right: number;
        rightText?: Phaser.GameObjects.Text;
    };


    constructor() {
        ...

        this.score = {
          left: 0,
          right: 0,
        };
    }

    create() {
        this.score.leftText = this.add.text(16, 16, "Left: 0", {
            fontSize: "32px",
            color: "#fff",
        });

        this.score.rightText = this.add.text(800 - 400, 16, "Right: 0", {
            fontSize: "32px",
            color: "#fff",
        });
    }
}
now to track when we need to change the score, we need to call a function (callback) whenever the ball touches one of the sides. We already have this check in the Ball class:
...
this.scene.physics.world.on(
      Phaser.Physics.Arcade.Events.WORLD_BOUNDS,
      (
        body: Phaser.Physics.Arcade.Body,
        _up: boolean,
        _down: boolean,
        left: boolean,
        right: boolean
      ) => {
        if (body.gameObject !== this.gameObject) {
          return;
        }

        if (right || left) {
          this.gameObject.setVelocity(0, 0);
        }
      }
instead of stopping the ball, we will do two things:
- destroy the ball
- call a callback that is provided to the create function
create(onCollideWithWorldBound: (winner: "left" | "right") => void) {
    ...
    this.scene.physics.world.on(
      Phaser.Physics.Arcade.Events.WORLD_BOUNDS,
      (
        body: Phaser.Physics.Arcade.Body,
        _up: boolean,
        _down: boolean,
        left: boolean,
        right: boolean
      ) => {
        if (body.gameObject !== this.gameObject) {
          return;
        }

        if (right || left) {
            // destroy the ball
          this.gameObject.destroy();
          // call the provided callback
          onCollideWithWorldBound(left ? "right" : "left");
        }
      }
}
now in game-scene.ts we will provide this callback that will add a point to the correct player:
game-scene.ts
create() {
    ...
    this.ball.create((winner) => {
      this.addPoint(winner);
    });
}

addPoint(winner: "left" | "right") {
    // add a point to the winner
    this.score[winner]++;
    // write that new score on the screen
    this.score[`${winner}Text`]?.setText(
      `${capitalize(winner)}: ${this.score[winner]}`
    );
}
As you see, this.ball.create now calls a callback (from knowing the code on Ball.ts we know it's called when the ball collides with the world bounds). This callback now calls addPoint. and addPoint saves the new score and draws that on the screen.
Part 6 - Count scores up to 10
We want to continue playing until one of the players has a score of 10. Let's first see how to continue playing. We need to recreate the ball. We don't need to recreate the whole Ball object, we just need to call this.ball.create again:
create() {
    this.playerL.create();
    this.playerR.create();
    this.ball.create((winner) => {
        this.addPoint(winner);
        this.ball.create();
    });
}
This was actually surprising for me, I expected the ball to appear twice, but the callback we gave the first this.ball.create is called again and again, because we added the event on the world object, which we don't destroy. The thing I missed here is what we call closure, and that means that onCollideWithWorldBound will always exist in the context of the event handler we're running on this.scene.physics.world.on (I simplify it, go read about closure)
So I suggest moving the setting of the callback to a setCallback method on the ball that will be called once in create of GameScene:
setCallback(onCollideWithWorldBound: (winner: "left" | "right") => void) {
    this.scene.physics.world.on(
      Phaser.Physics.Arcade.Events.WORLD_BOUNDS,
      (
        body: Phaser.Physics.Arcade.Body,
        _up: boolean,
        _down: boolean,
        left: boolean,
        right: boolean
      ) => {
        if (body.gameObject !== this.gameObject) {
          return;
        }

        if (right || left) {
          // destroy the ball
          this.gameObject.destroy();
          // call the provided callback
          onCollideWithWorldBound(left ? "right" : "left");
        }
      }
    );
  }

  create() {
    this.gameObject = this.scene.physics.add.image(400, 300, "ball");
    this.gameObject.setVelocity(200, 200);
    this.gameObject.setCollideWorldBounds(true);
    this.gameObject.setBounce(1);
    this.players.forEach((p) => {
      if (p.gameObject && this.gameObject) {
        this.scene.physics.add.collider(this.gameObject, p.gameObject);
      }
    });

    this.gameObject.body.onWorldBounds = true;
  }
see how we removed the setting of the callback to another method that isn't called on create.
game-scene.ts
create() {
    this.playerL.create();
    this.playerR.create();

    this.ball.setCallback((winner) => {
      this.addPoint(winner);
      this.ball.create();
    });

    this.ball.create();
  }
Now our game will be played until one of the players gets tired :)
Let's stop the game when one of the players gets a score of 10:
this.ball.setCallback((winner) => {
  this.addPoint(winner);
  if (this.score[winner] < 10) {
    this.ball.create();
  }
});
Part 7 - show the winner
To show the winner, I think ideally it would be to create another scene, but that's a good enhancement we can add later.
game-scene.ts
...
create() {
this.ball.setCallback((winner) => {
this.addPoint(winner);
if (this.score[winner] < 10) {
this.ball.create();
} else {
this.gameEnded();
}
});
this.ball.create();
}
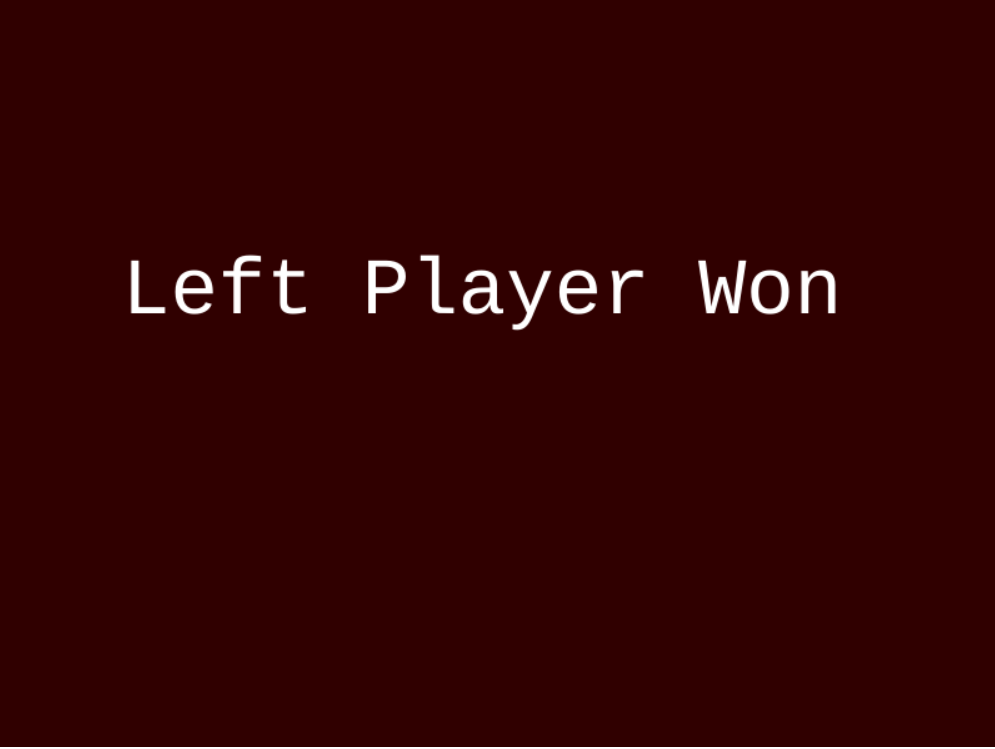
gameEnded() {
// clear the screen
this.playerL.destroy();
this.playerR.destroy();
this.score.leftText?.destroy();
this.score.rightText?.destroy();
const winner = this.score.left > this.score.right ? "Left" : "Right";
this.add.text(100, 200, `${winner} Player Won`, {
fontSize: "64px",
color: "#fff",
});
}
we also need to change the update method for Player to check if the gameObject is existing:
Player.ts
update() {
    if (!this.gameObject) {
      return;
    }

    this.gameObject?.setVelocity(0);

    if (this.keyUp?.isDown) {
      this.gameObject?.setVelocityY(-300);
    } else if (this.keyDown?.isDown) {
      this.gameObject?.setVelocityY(300);
    }
}

destroy() {
    this.gameObject?.destroy();
    this.gameObject = undefined;
}
And this is the result
The end
To summarize, we created a simple pong game with phaser and Typescript. We started with planning the project and writing the required tasks for a minimum implementation, then we built the project structure from a template we found online that uses Phaser, Vite, and TypeScript. From there, we started implementing the actual game. First drawing the basic game objects on the screen, then we let the two players control their paddle and made the ball bounce around the screen.
After this was done, and with the knowledge we collected, we refactored the code to be structured better (very subjective opinion). We added scores and announced who's the winner.
Links
Quick things we should add
- The ability to restart the game
- Sounds
- Make the ball go in a different direction every time


